>>
30-MINUTE MEALS! Get the email series now →


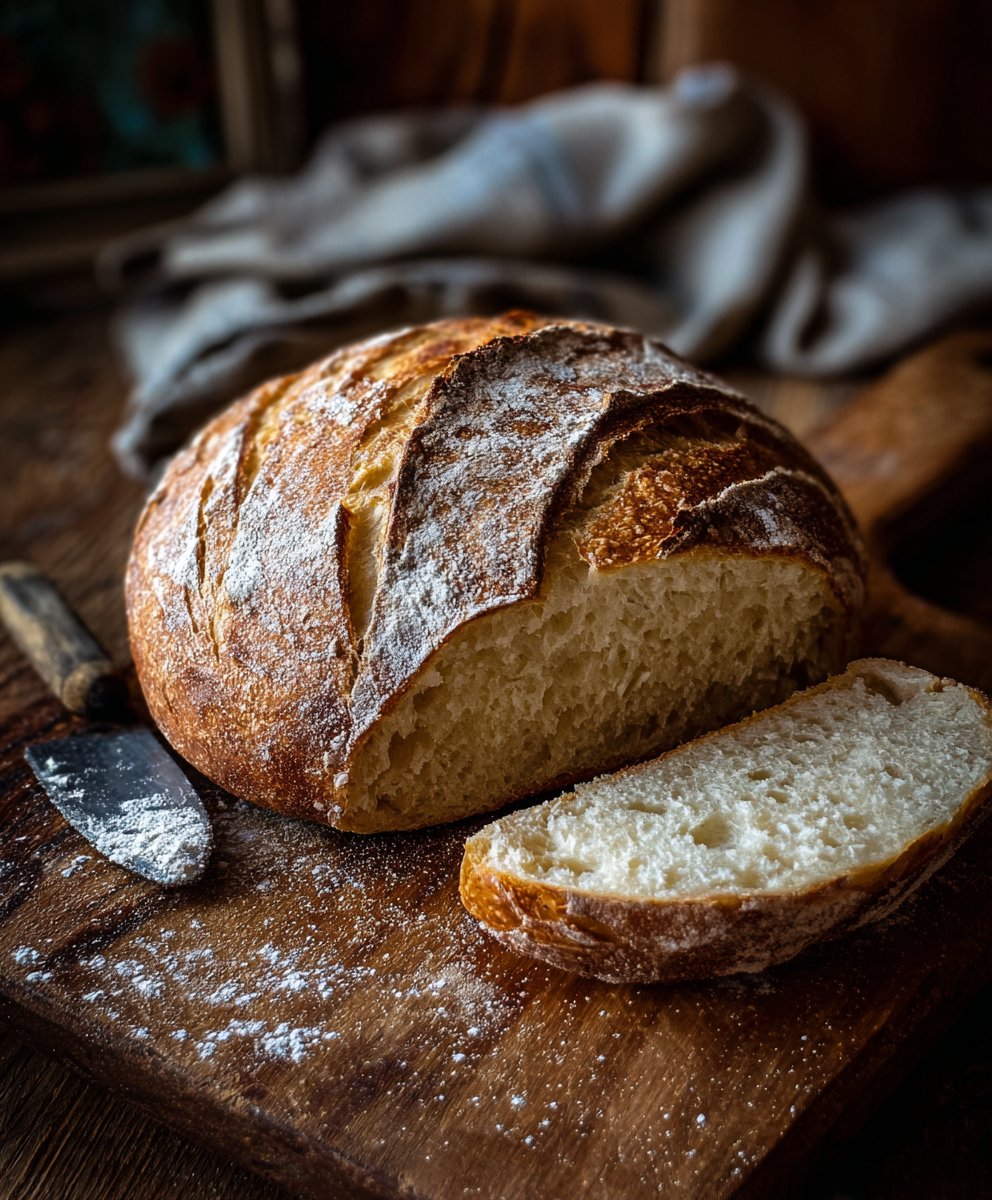
A simple no knead gluten free loaf that yields a tender crumb and crisp crust with minimal effort. Perfect for mornings and weeknight toasts.
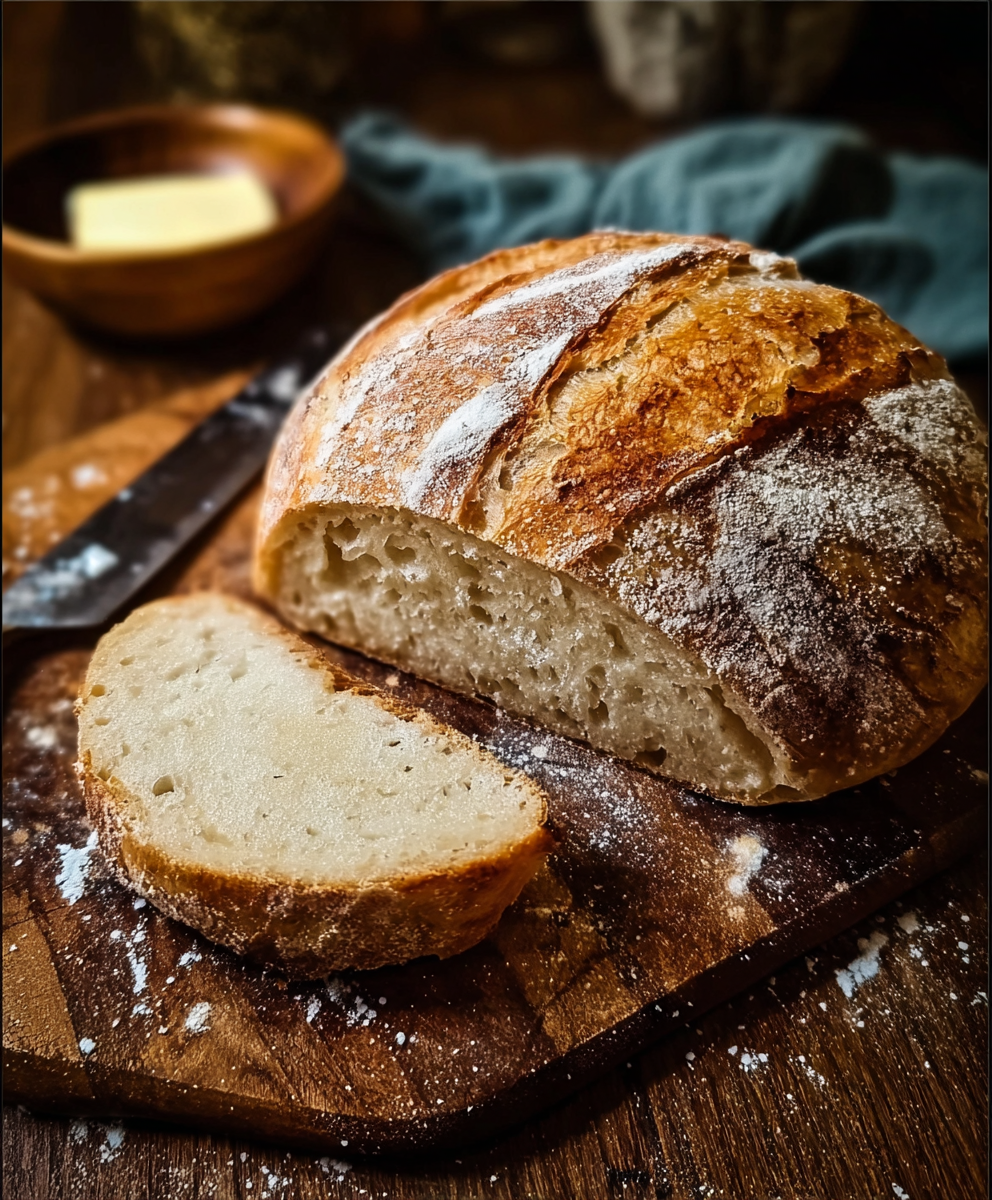
This no knead gluten free bread became my go to when I wanted the comfort of homemade bread without hours of active work. I discovered this mix of ingredients on a rainy afternoon while trying to recreate the texture of a country loaf using only pantry staples. The result surprised me with a soft, slightly open crumb and a crackly crust that browns beautifully in a hot oven. It is forgiving, so even when life is hectic this loaf comes together reliably.
I first served this bread at a small family brunch and watched two picky eaters reach for seconds before lunch ended. The scent of warm yeast and toasted crust filled the kitchen and created a little ritual around slicing the loaf. Texture is the star here, with a moist interior that holds butter and jam without crumbling, and a crust that gives a satisfying bite. This loaf is simple enough for weekday baking and handsome enough for guests.
When I bake this loaf I enjoy the relaxed pace. I often mix the dough before work and let it rise while I go about my day, then shape and bake in the evening. Family members have commented that it tastes like bread from a small local bakery, especially when I brush the crust with a touch of olive oil before baking. It has become a staple for weekend breakfasts and midweek sandwiches.

My favorite part of this bread is the way it invites improvisation. Once I learned the basic proportions I began adding toasted seeds for texture and herbs for savory toasts. Family members have asked me to bring this loaf to gatherings because it travels well and pairs with many toppings. The aroma while baking always draws people into the kitchen and starts conversations.
Store the loaf at room temperature in a paper bag for up to two days to preserve crust texture. For longer storage place slices in a freezer safe bag, press out the air and freeze. When reheating frozen slices use a toaster or a hot skillet for best texture. To refresh a whole loaf, heat the oven to 350 degrees Fahrenheit and warm for 10 minutes wrapped in foil to avoid over crusting.
If you prefer a softer crumb replace olive oil with an equal amount of melted coconut oil or a mild vegetable oil. Use agave syrup instead of honey for a vegan option. If your blend lacks xanthan gum add one quarter teaspoon per cup of flour. For added flavor fold in up to one quarter cup of toasted seeds or finely grated cheese if dairy is suitable.

Slice and serve warm with good butter and jam for breakfast, or use for open faced sandwiches topped with avocado and smoked fish for lunch. For dinner serve alongside a soup or salad. Garnish with fresh herbs or a drizzle of olive oil. Toasted slices are excellent for making croutons or a quick panzanella when tomatoes are in season.
Gluten free baking draws on traditional techniques while adapting to different flours. This no knead approach echoes rustic European country baking where time and high hydration create texture rather than extensive handling. The method celebrates simplicity and technique rather than complex ingredients. Over the past decade home bakers have adapted these methods to gluten free blends to recreate the familiar smells and comforts of freshly baked bread.
In cooler months stir in a tablespoon of molasses for a richer flavor and darker crust. In summer fold in chopped sun dried tomatoes and basil for a vibrant loaf that pairs well with fresh salads. For holiday breakfasts add warm spices and dried fruit then reduce salt slightly. Each season offers ways to make the loaf feel new while keeping the same simple method.
Make two loaves and freeze one to save baking time. Slice the frozen loaf into portions that suit your household. Prepare spreads and toppings in advance such as herb butter or roasted garlic and store in small containers. Use clear labeling with date and contents so you can rotate frozen loaves within three months for optimal flavor.
At its heart this loaf is about ease and comfort. It gives you delicious bread with minimal fuss and lots of room to customize. I hope you make it often and that it becomes a familiar scent in your kitchen.
Use warm water between 105 and 115 degrees Fahrenheit to activate the yeast without killing it.
Allow the loaf to cool at least thirty minutes before slicing to avoid a gummy interior and to set the crumb.
If your flour blend lacks xanthan gum add one quarter teaspoon per cup of flour to improve structure.
This nourishing no knead gluten free bread recipe is sure to be a staple in your kitchen. Enjoy every moist, high protein slice — it is perfect for breakfast or as a wholesome snack any time.
If you only have active dry yeast proof it in the warm water with the sugar for five to ten minutes until bubbly, then mix into the dry ingredients.
Yes, slice the loaf and freeze in a freezer safe bag for up to three months. Toast slices directly from frozen or thaw at room temperature.
This No Knead Gluten Free Bread recipe makes perfectly juicy, tender, and flavorful steak every time! Serve with potatoes and a side salad for an unforgettable dinner in under 30 minutes.
Whisk the gluten free flour, salt, instant yeast, and sugar in a large bowl until well combined and there are no lumps.
Pour warm water and olive oil into the dry mix and stir until a sticky dough forms. Do not overmix.
Cover and let the dough rise in a warm spot until increased by about thirty to fifty percent, one to two hours depending on temperature.
Turn the dough onto a lightly floured surface and shape into a loose oval with minimal handling. Transfer to parchment and rest for twenty to thirty minutes.
Preheat oven to 450 degrees Fahrenheit and heat a Dutch oven if using. Score the loaf and brush with olive oil if desired.
Bake covered for twenty minutes then uncovered for twenty to twenty five minutes until deep golden and internal temperature reaches about 205 degrees Fahrenheit.
Cool the loaf on a wire rack for at least thirty minutes before slicing to set the crumb.
Last Step: Please leave a rating and comment letting us know how you liked this recipe! This helps our business to thrive and continue providing free, high-quality recipes for you.
Leave a comment & rating below or tag
@royalrecipe on social media!

Learn how a 5-minute prep transforms a whole garlic bulb into silky, caramelized cloves in the air fryer. Perfect as a spread, mix-in, or flavor booster that elevates weeknight meals and party plates.

A bright, spicy and slightly sweet salmon dish finished with a creamy bang bang sauce. Ready in 15 minutes, it delivers restaurant flavor with weeknight ease.

A comforting, protein-packed twist on classic pot pie flavors, transformed into a creamy, one-pot soup that is perfect for weeknights and meal prep.
Leave a comment & rating below or tag @royalrecipe on social media!
Enjoyed this recipe? Share it with friends and family, and don't forget to leave a review!
This recipe looks amazing! Can't wait to try it.
Comments are stored locally in your browser. Server comments are displayed alongside your local comments.

Join to receive our email series which contains a round-up of some of our quick and easy family favorite recipes.